There are so many things that can mess up the quality of your scanned documents—image noise, uneven lighting, glare, shadows, stains, wrinkles, and those annoying show-throughs from the other side of the page. But let’s be real—who cares what these issues are called or where they come from? We just want them gone, quickly and with minimal effort. If you’re nodding along, we’ve got great news! iScanner has just released a new filter that can denoise images and remove shadows, show-throughs, and other artifacts from both black & white and color scans—with just one tap.
What Does Denoise Mean
Image denoising is a term used to describe a range of techniques and processes aimed at removing digital noise and unwanted artifacts from an image. Essentially, it involves the removal of visual information that lacks meaning to the viewer or a processing system, such as random color pixels, shadows, smudges, etc., while preserving the important details of the image.
Why Is It Important to Denoise Your Scans
There are three main reasons why you should denoise your scans.
First of all, denoising gives them a tidier, more professional look.
Second of all, denoised images are much easier to read, which makes it easier to focus on the actual content.
Lastly and most importantly, noise and various artifacts create a serious problem for optical character recognition software. Shadows, stains, glare, creases, and show-throughs can cause OCR algorithms to misread the characters which can result in incorrect or incomplete extraction of data.
This is why most organizations will reject applications containing scanned images with low resolution or multiple visual artifacts. So even if you aren’t fussy about the overall look of your scans, there might be situations where it will be necessary to denoise them, and it’s always handy to have an easy-to-use tool that is always on hand.
Get the Best Possible Scan Quality Even in Tricky Conditions
Tricky conditions are unfortunately much more common than perfect ones. Therefore, the Clear filter is an invaluable tool if you need to scan a lot on the go. Here are several things it can help you with:
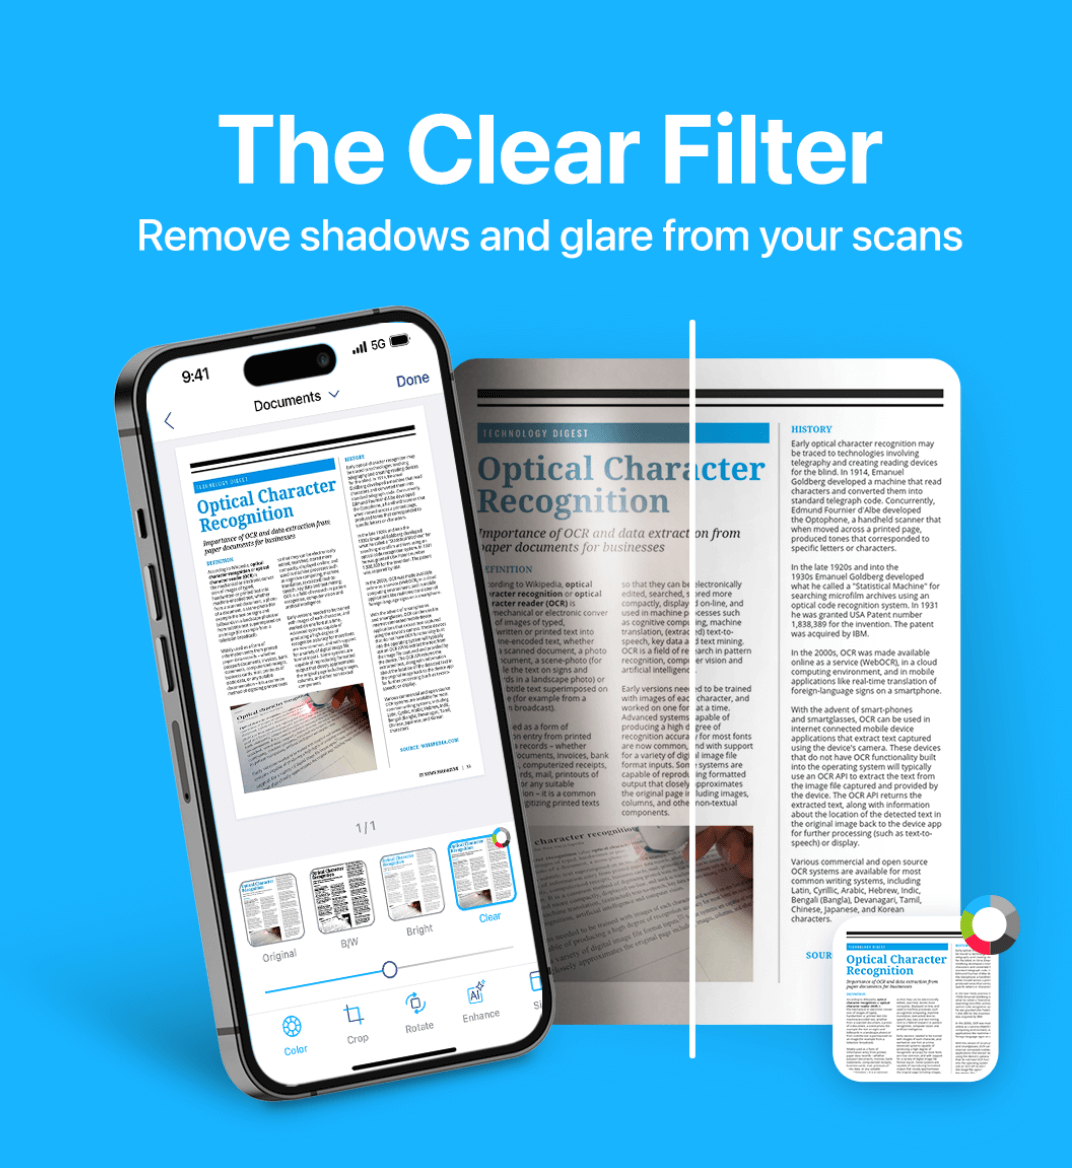
Glare and shadow removal—Natural light is great, but trying to scan something on a sunny day can be a real quest because glare and shadows are pretty much impossible to avoid. Save time with the Clear filter—just make a shot and the filter will remove shadows and glare.
See-Throughs Correction—See-throughs are a common issue with thin pages because the contents of the underlying page will inevitably show on the one you’re trying to scan. The Clear filter can take care of that too.
Smudges and Stains Removal—If your source document isn’t in a pristine condition, you can remove smudges and stains with just a tap.
Colored Pixel Noise Reduction—Pixelated images are very common if the picture was taken in insufficient lighting conditions. The Clear filter can identify random colored pixels responsible for visual noise and remove them, creating a much clearer, tidier picture.
What You’ll Like about the New Filter
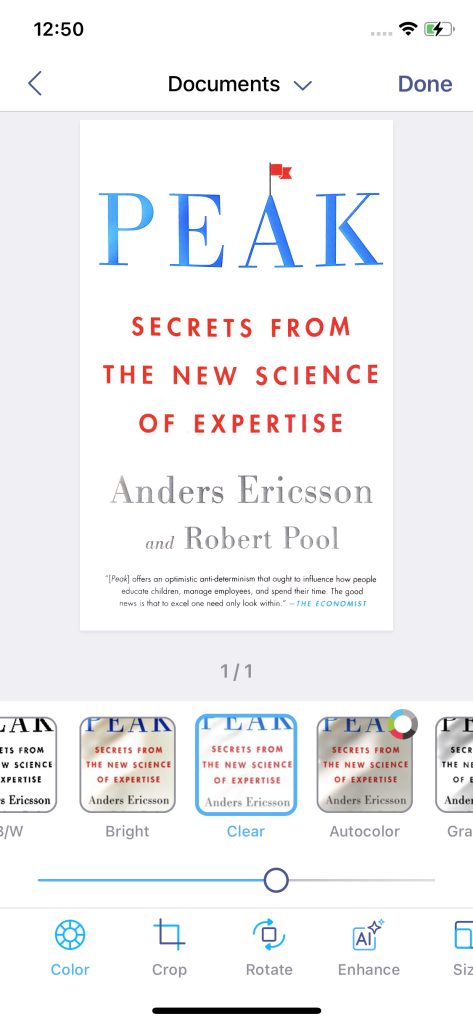
It has a slider controller, so you can adjust the effect of the filter very easily.
You can see all the changes in real time—no need to save to see the result.
It can deal with color images as well as B&W ones. If you’ve tried to remove shadows from a color image, you probably know that it can be a real pain in the backside.
The filter can change the background color completely while preserving the original color of the text.
You can denoise not only the documents you’ve scanned with the app but also upload images from your camera roll, files, email, etc.
It’s super easy to use (as shown below).
How to Denoise Scans and Remove Shadows with the Clear Filter