
14 apr 2026
The ability to properly present your professional competencies to a potential employer through your CV, resume, and other relevant documents has become an ultimate skill. This is especially true at the very first stage of applying for a job, when first impressions are formed before you even speak to a recruiter. In this guide, you’ll learn how to scan job application documents so their professional-looking appearance can increase your chances.
When you apply for a job, the decision doesn’t depend on your skills and experience only. Your documents matter too. And it’s not just about accurately describing your duties in your CV or career path in a cover letter. The way your documents look, their size, and format also play a role.
Recruiters spend about 7 seconds on average when they check a resume for the first time, and if it’s cluttered or unclear, it can cost you opportunities. To make everything professional, you need to know how to create a high-quality scan of your hard copies.
The list of documents is usually mentioned in the job description, but the most common include:
Here’s how to make a perfect copy of your documents in six steps:
Mobile scanners provide the quality needed for job application documents and are much more convenient and flexible than standard scanners. Some of them also offer additional editing and enhancement features, some of which are particularly useful when fine-tuning your CV or resume. We’ll talk about them in detail soon.
Anyway, these are the key features of a mobile tool needed for scanning job application documents:
There are dozens of scanning apps available, but one option that meets all the criteria is iScanner. It’s a mix of a mobile scanner and PDF editor, which makes it capable of solving practically any document-related task.
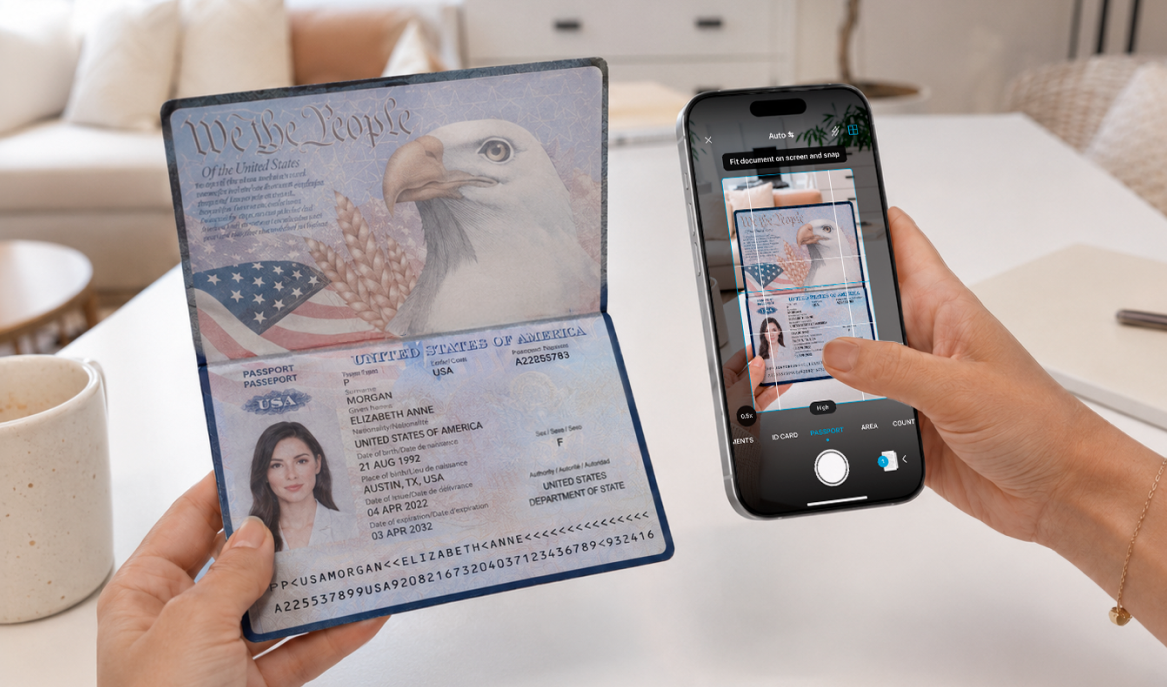
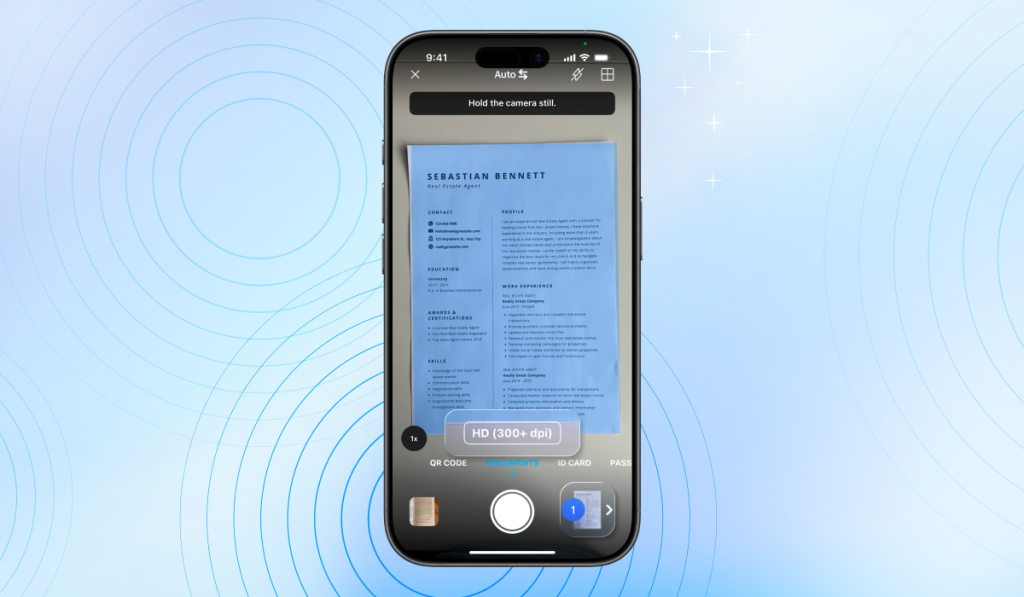
Find a place with proper lighting that’s easily accessible so your phone can be positioned parallel to the document you’re scanning. If you need to scan in imperfect conditions, like on the road, don’t worry—you’ll still be able to fix even imperfect copies later.
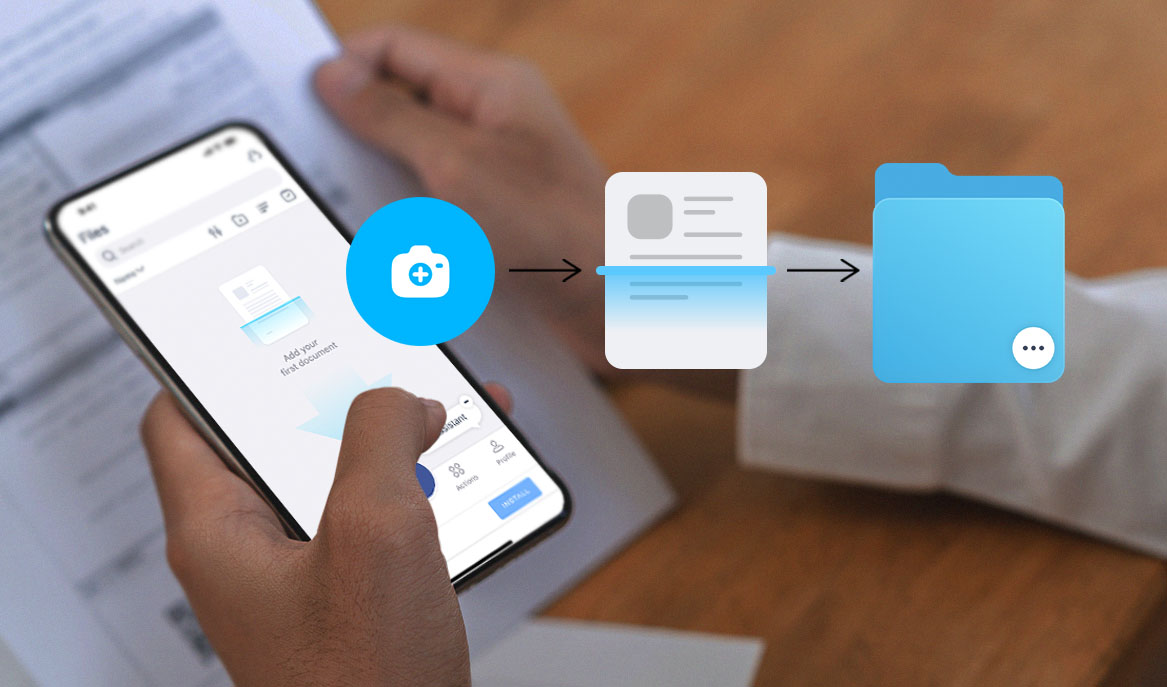
To start scanning with iScanner:
Congrats! You’ve scanned your documents. Now, it’s time to make them look perfect.
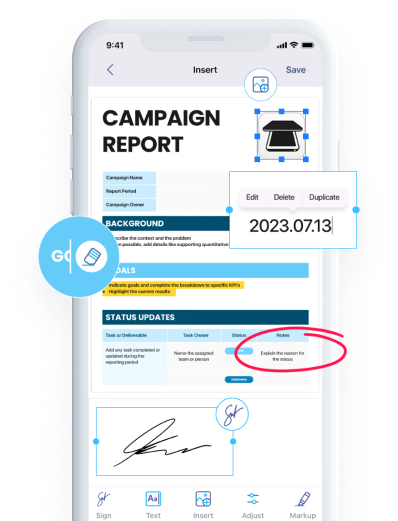
When you tap the image of your scan in the bottom left, you’ll be taken to the enhancement screen. Here, you can improve and edit your scans in any way you need.
Click Done when you’re finished.
Pro Tip: If you want to apply all quality improvements at once, tap the AI Magic button. It automatically enhances your scan straight away.
Your scans look perfect now, which means half the job is done! This next step seems pretty obvious and easy, but it’s no less important.
Descriptive file names will make it easier for recruiters to navigate your application. So, instead of “March 12” or “version_3a_final,” it’s better to use something like “John_Smith_CV.”
There are two ways to do this in iScanner: by editing the name manually, or by using the AI-powered Smart Naming feature, which automatically generates clear file names based on their content.
Now your documents are ready to be submitted, and you can do this straight from the app. Here’s how:

If you need to adjust your CV or recommendation letter for another position or company, there’s no need to repeat the whole process. In iScanner, you can update already scanned documents and add the necessary information directly in the app.
To do this, find the file in My Files and open it. There you can: