
02 jul 2026
You rarely need these documents—until you do. Having digital copies makes them easier to access, but scanning them properly can be a challenge.
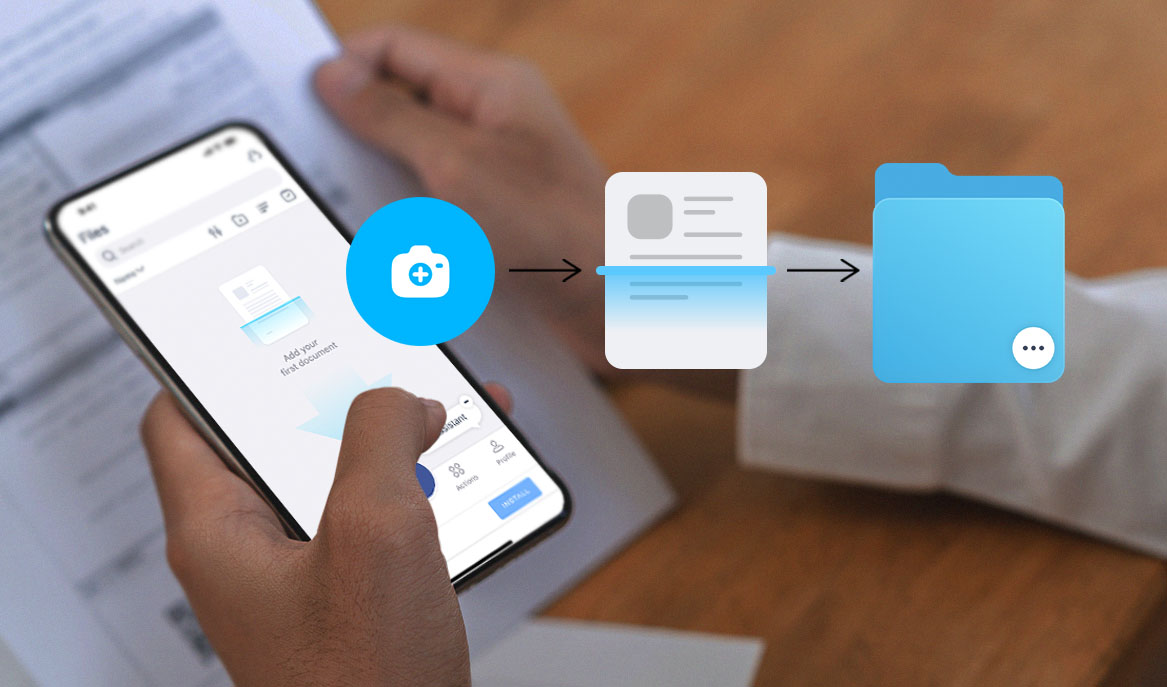
You can digitize documents with a traditional scanner, but it isn’t the most convenient option. Instead of searching for a scanner, scanning each document separately, and transferring them to your device, you can do everything from your phone with a mobile scanner.
Take iScanner, for example. Once installed, you can create high-resolution scans (300 DPI) and use the app’s document management features to handle common scanning and document-related tasks.
Here’s how to scan with iScanner:
Digital copies don’t replace original documents in every situation. A scanned passport may help confirm your identity or insurance information, but it can’t replace the original passport when traveling.
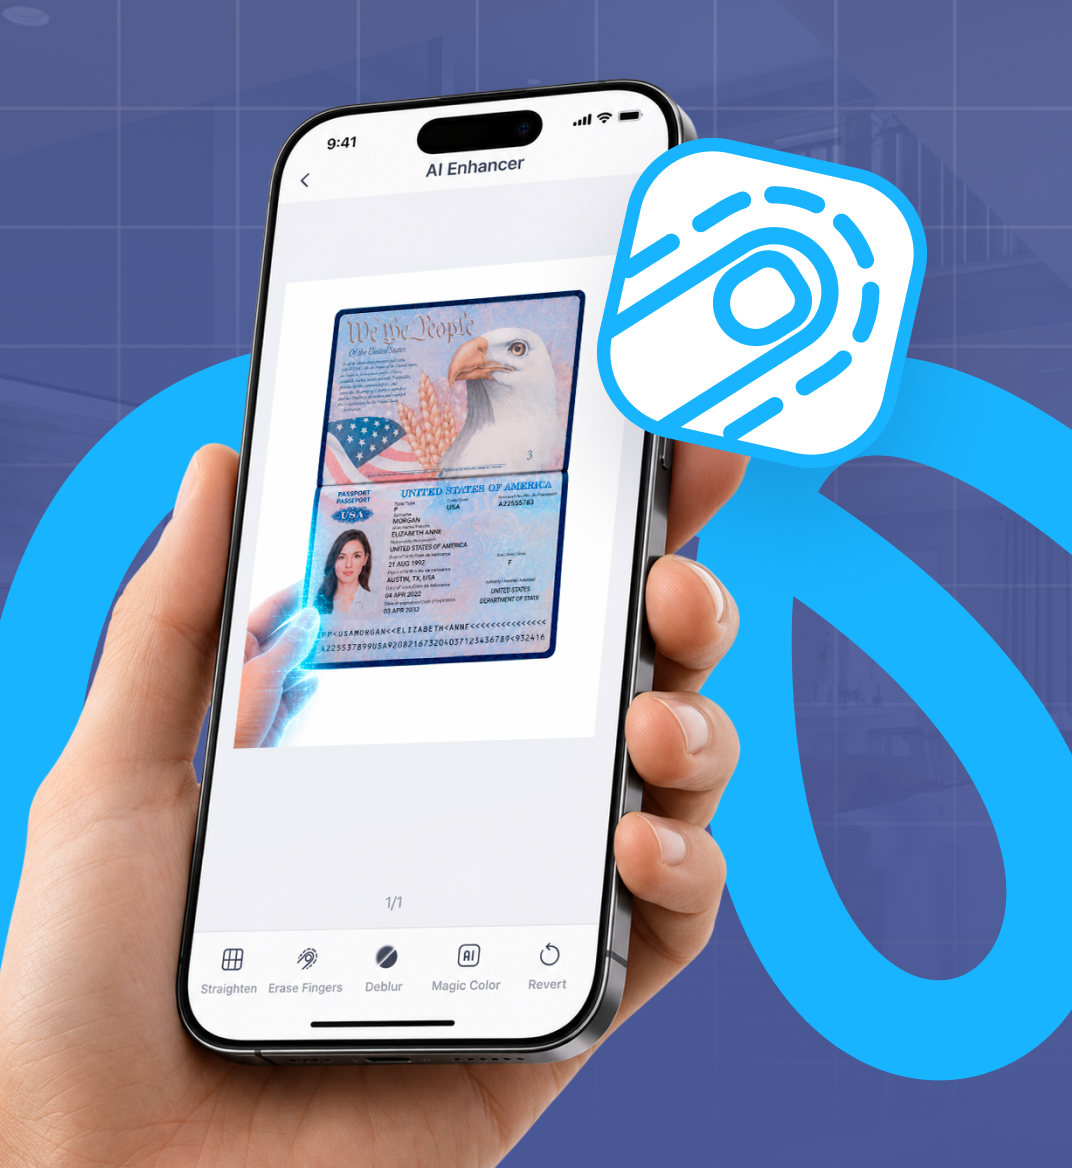
A passport is the #1 document to keep accessible when traveling.
A common challenge when scanning it is that your fingers sneak into the frame. Typically, you need to hold the pages open to flatten them for a clear scan, which means your hand ends up covering part of the document.
How to fix it with iScanner
Finger Eraser automatically detects and removes fingers from the scan, restoring the background underneath.
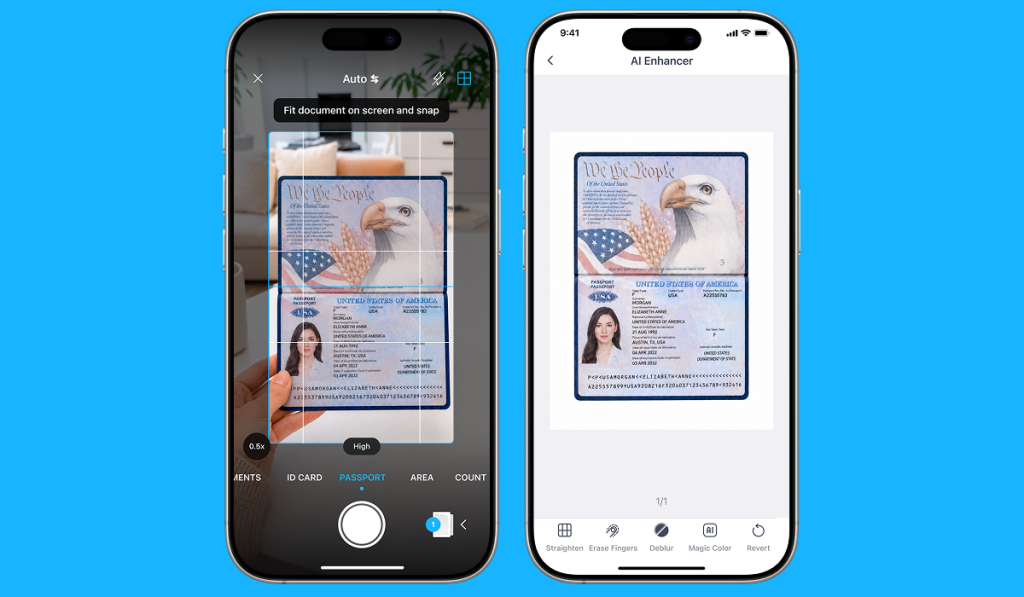
Pro Tip: Choose Passport mode when scanning. It identifies the document type and preserves its original borders, so you don’t need to crop it or remove the background afterward.
An ID card contains information on both sides, and making separate copies isn’t usually an issue. However, when you need to submit an application, you’re often asked to send scans of both sides on a single page. Without the right tool, that gets tricky.
How to fix it with iScanner
Select ID Card mode and choose Both Sides before scanning. After capturing the front and back, the app will combine them on a single page.
You don’t use a social security card often, but when you do, it’s always for something important, like filing taxes, applying for a new job, opening a bank account, or verifying your identity.
Because it’s rarely used, it can be hard to find, even if it’s already digitized. We don’t always name files properly, so it may end up buried in a random folder titled “New_File_125.”
How to fix it with iScanner
Let the app automatically name your documents after scanning. File Name Generator creates a descriptive file name based on the document’s content. To turn this function on, go to Settings, tap Document Name Format, and choose Automatic.
Pro Tip: If you use a naming convention, you can create custom templates that follow it, so you don’t have to manually name your files every time.
Birth and marriage certificates officially prove your identity and family status. They’re frequently requested for passport applications, immigration processes, name changes, school enrollment, and other procedures.
In most situations, you only need a single detail from the certificate, such as its number or date of issue. If the scan is stored as a simple image, you’ll have to retype the information manually, which is inconvenient and leaves room for errors.
How to fix it with iScanner
Optical character recognition (OCR) converts a scan into editable text, allowing you to search and copy information when needed. To recognize all the text in a document, tap Edit Text after scanning. To recognize only a specific section, tap and hold that part of the scan.
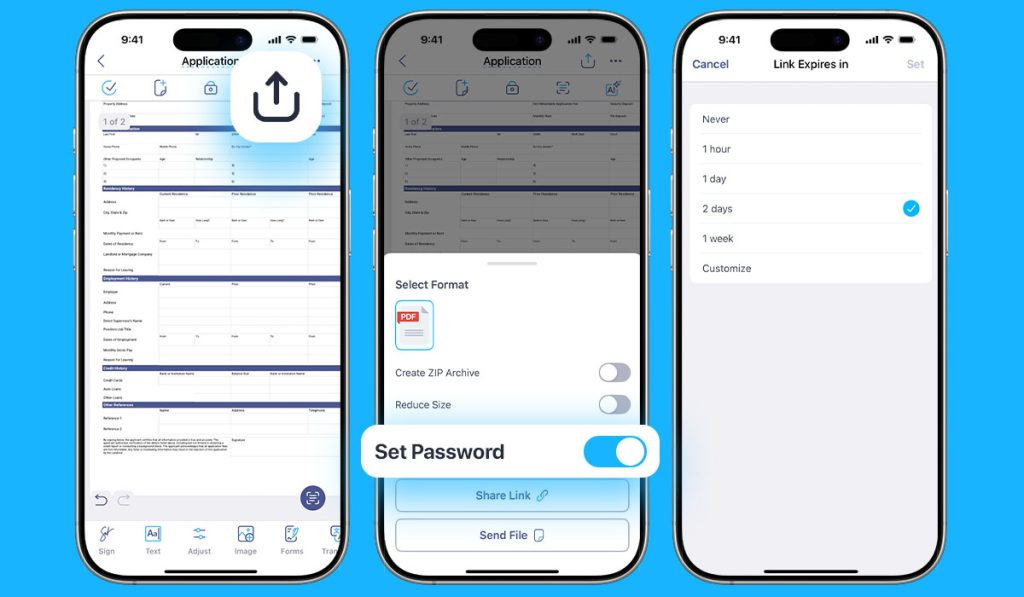
Financial papers include insurance records, tax returns, bank statements, loan agreements, and other related documents.
These documents often contain sensitive personal or financial information that you don’t want to share with unauthorized people. That’s why it’s important to keep your files protected.
How to fix it with iScanner
These are the five important documents to keep digitized and at hand, each with its own scanning challenges and the iScanner tools to handle them:
Passport. Fingers often cover parts of the document during scanning—Finger Eraser clears the scan and restores the background.
ID Card. Both sides are often required on a single page—ID Card mode combines the front and back into one scan.
Social Security Card. Digitized copies can get buried under generic file names, making them hard to find—File Name Generator keeps documents properly named and searchable.
Birth & Marriage Certificates. You often need specific details from them—OCR lets you search and copy text directly from scans.
Financial Papers. Contain sensitive data that should be protected—secure folders, PIN protection, and two-factor authentication help protect your privacy and make sharing safer.