
05 may 2026
Scanning documents is a quick way to handle everyday paperwork. In this guide, we’ll cover how to scan physical documents on your smartphone, what to expect from built-in options on iOS and Android, and how to choose a more advanced tool when you need one.
All you need to start scanning documents is a dedicated tool. The good news is that you likely already have one preinstalled on your smartphone, whether you use iOS or Android. These built-in apps are Notes (iOS) and Google Drive (Android). They handle basic scanning tasks quite well, but with notable limitations.
First, ideal results require ideal conditions: good lighting, a flat surface, and a clean, neatly positioned document. That’s usually doable if you’re at home or in an office, but not always realistic when you’re on the go.
Second, built-in scanners have limited functionality. If you need to e-sign a document, extract and edit text, organize multiple scans, or merge and split files, you’ll likely need something more capable.
In short, these tools are well-suited for basic tasks, like scanning a receipt or a note to keep it on file. For more complex needs a more advanced tool is the better choice.
Any good mobile scanner should have:
An app that brings all these features together is iScanner. It started as a simple mobile scanner 10 years ago but has since evolved into a full document management platform. Today, it combines high-resolution scanning, accurate OCR, and editing tools, making it effective for both quick scans and more advanced tasks.
iScanner is available on both iOS and Android. Download it for your platform here.
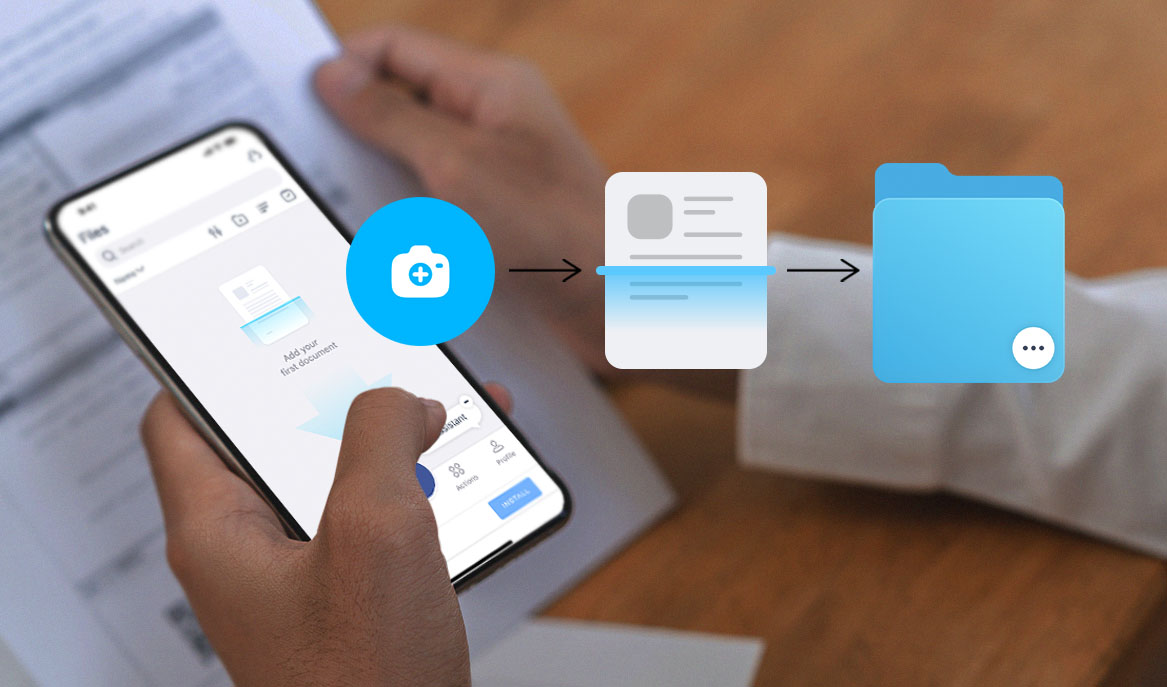
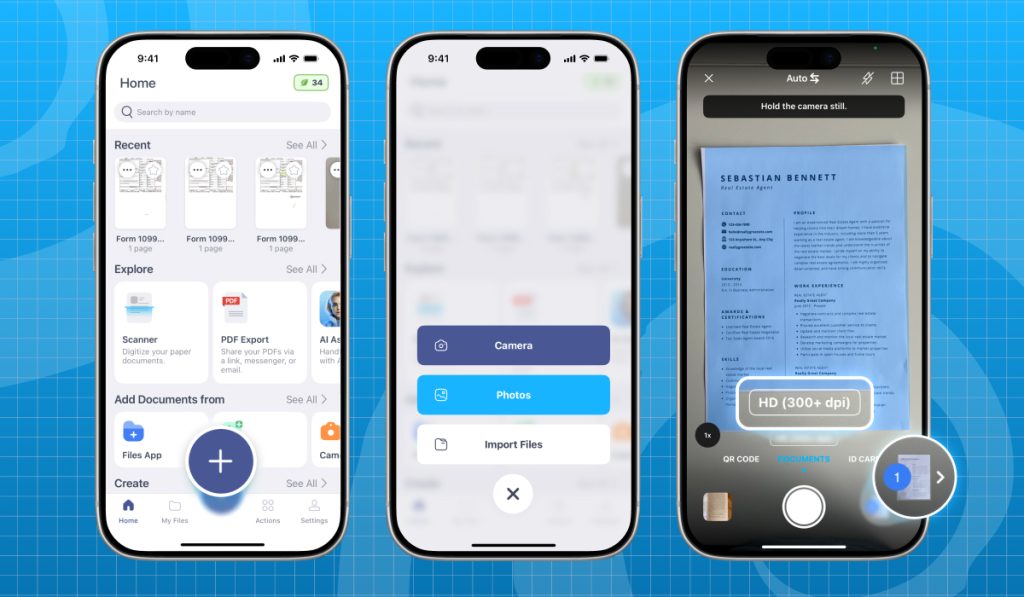
Once installed, tap on the iScanner icon to open it.
Good lighting, no shadows, and a flat surface make a difference. The better the conditions, the better the result.That said, if you’re on the go and can’t get the setup quite right, it’s not a problem. We’ll discuss how to fix those imperfections in the following steps.
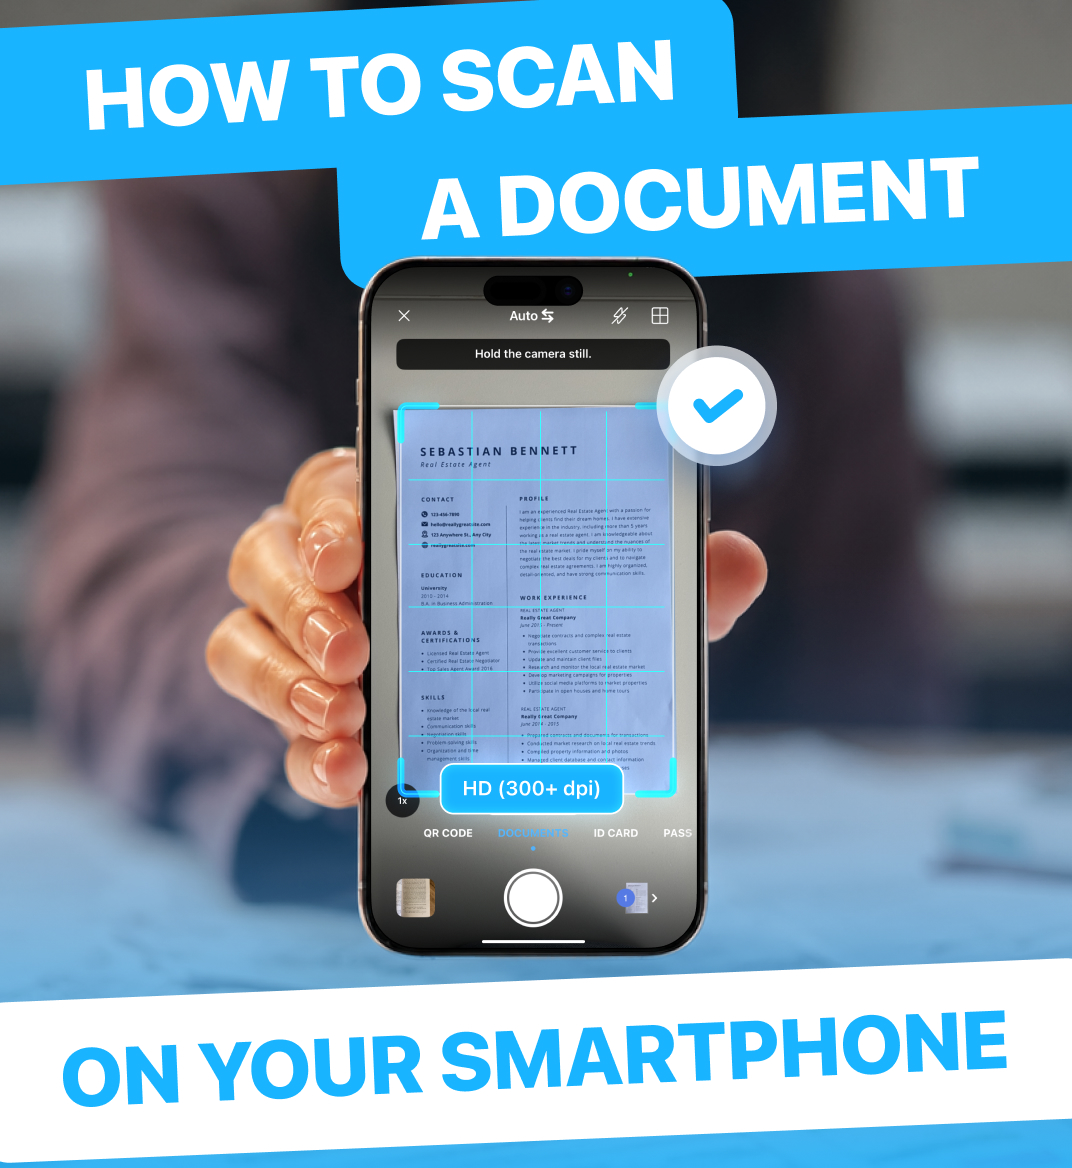
To scan a document in iScanner:
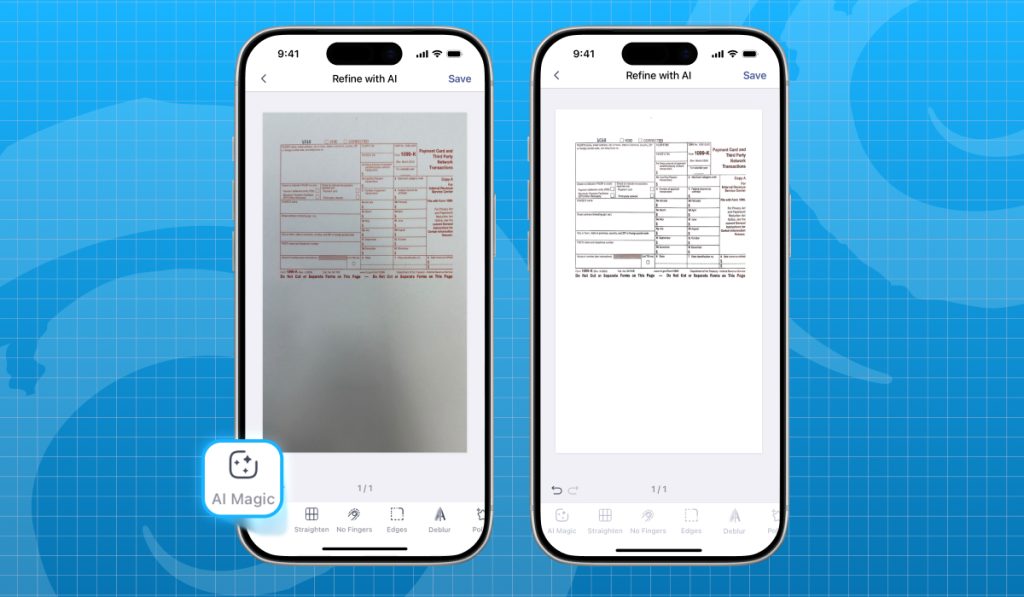
On this screen, you have several options for improving scan quality:
Tap Done when you’re ready.
Pro tip: To apply all refinement features at once, tap AI Magic in the Refine menu.
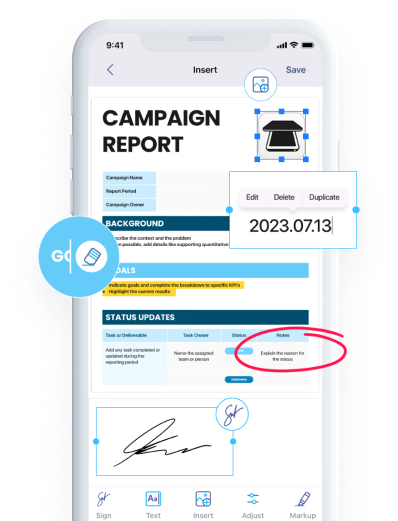
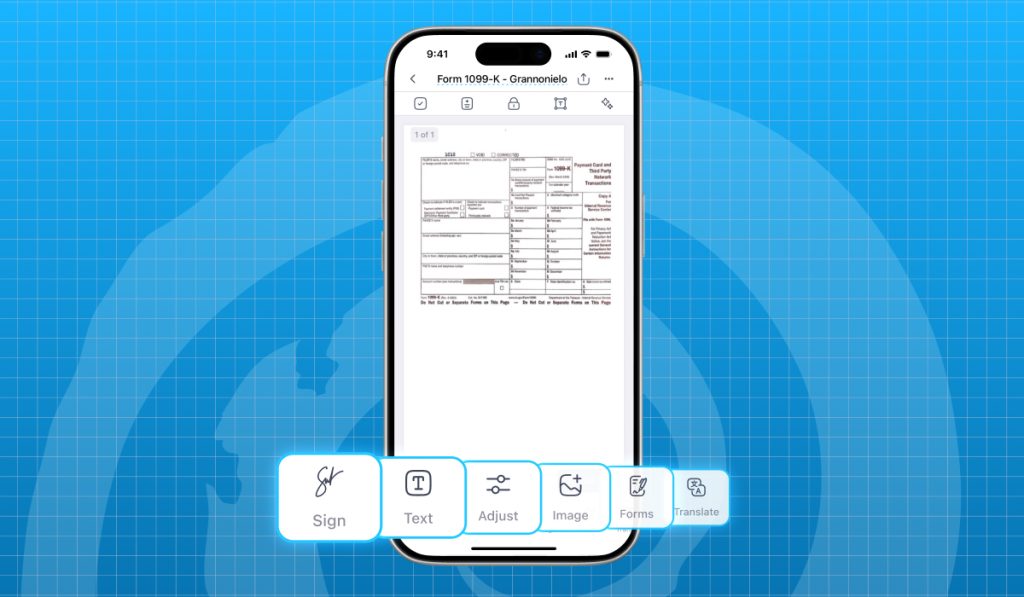
Once your document is scanned, adjust it as you like. You can e-sign it, translate it into 108 languages, edit or add text or images, highlight key parts, hide or blur sensitive information, add watermarks, footers, page numbers, and more.
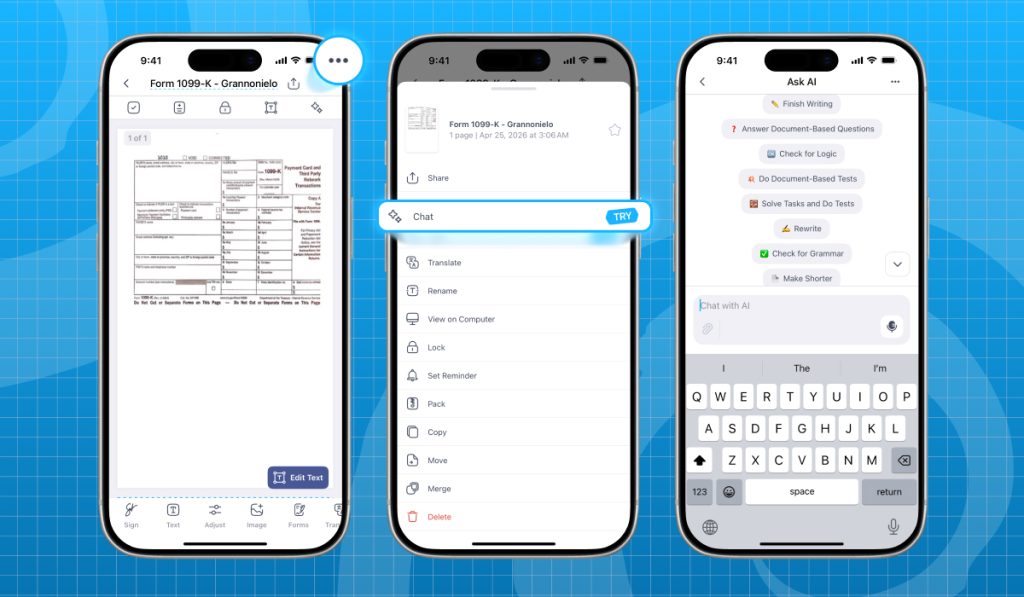
You can also use the iScanner AI assistant to take your document a step further (tap the three-dot icon in the top-right corner and select Chat). It helps you check the text for grammar or logical issues, improve clarity and tone, summarize content, and more. If you need something specific, type your request in the Chat with AI field.
With iScanner, you can export and share your document right after scanning. Tap the Share button in the top-right corner. You can save it locally, send it directly via email or messaging apps, or generate a shareable link.
For added security, you can set a password for your file (toggle the Set Password option) and choose an expiration date for your link (tap Share Link, then select the date in the Link Expires section).
Virtually every modern smartphone can scan a document. This feature usually comes preinstalled on iPhones (Notes) and Android devices (Google Drive) and can produce a clean, professional digital copy. However, the quality depends heavily on conditions: good lighting, a flat surface, and a neatly positioned document. Built-in scanners usually fall short when it comes to more advanced needs such as OCR-based text extraction, e-signing, or editing.
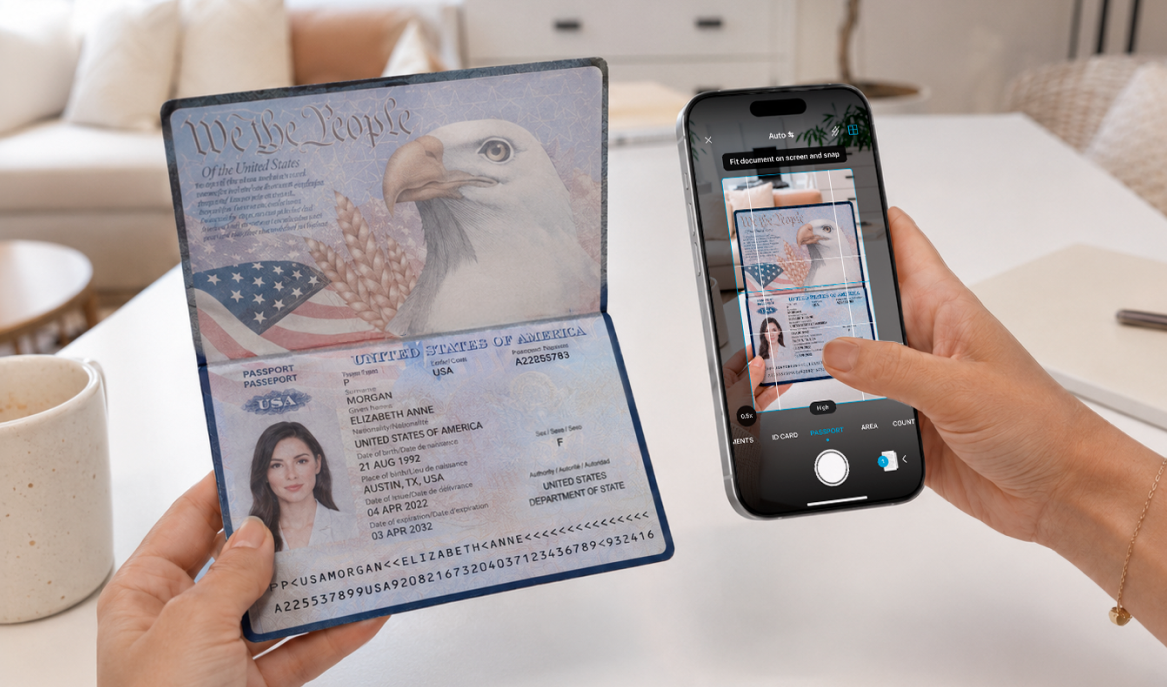
One tool capable of handling practically any scanning-related task is iScanner. Apart from digitizing documents in high resolution (300+ dpi), it allows you to refine image quality, edit content, use AI-powered tools, and export or share files in multiple formats. All of this makes the entire scanning process more efficient and flexible, and it can all be done in just a few taps.