
03 jun 2025
Is it a corner of your desk sneaking into the frame? Or annoying white margins that appear every time you make a copy with a traditional scanner? These little things can ruin the look and make your scans feel unprofessional. Cropping is a quick fix that makes your documents cleaner, neater, and easier to share. In this guide, we’ll show you how to crop a scanned document on your phone, Mac, or PC without any stress.
One of the most common issues with scanned files is white margins around the original document. The thing is, traditional scanners tend to capture more than just the paper you’re scanning, leaving white or pale lines along the edges.
Even if you scan with a mobile app, some of them include the background of the document inside the frame. It can be part of a table, for instance, or another page peeking out from behind. All of that makes your scanned file look distracting and unprofessional.

Other reasons include getting rid of unnecessary visual data to minimize the overall document size, highlighting relevant content, or hiding parts of a document for privacy.
Anyway, whatever the reason is, the solution is the same—cropping.
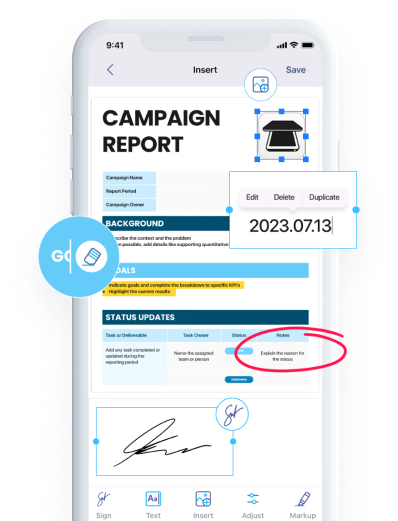
The easiest solution is to use a dedicated app like iScanner. Its cropping function is one of the core ones and takes a couple of seconds to do the job, allowing you to share the adjusted file straight from the app.
Moreover, being both a PDF editor and a mobile scanner, it also offers a variety of other features for working with scanned documents. And some of them might even make cropping for security reasons unnecessary. But we’ll talk more about that a bit later.
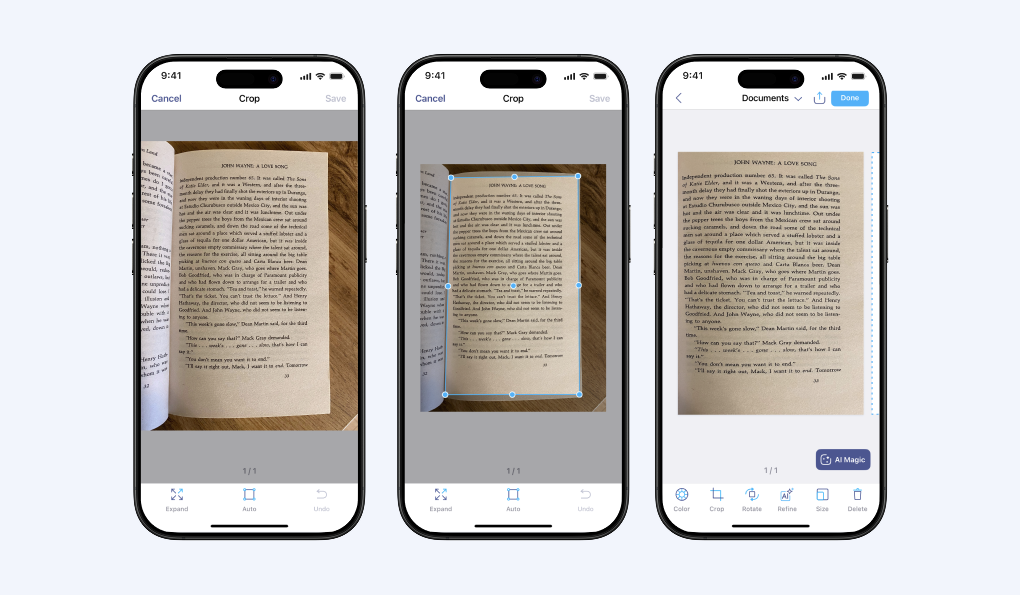
To crop the desired file, you can either upload an already existing scan into iScanner or make a new one with the app. The flow is practically the same, with one important exception. If you decide to scan a doc with iScanner, it’ll automatically detect its borders. Unlike many scanner apps, iScanner’s neural network works with any type of file, and the only thing a user needs to do is take a picture. The doc will be scanned accurately, without the need to crop it afterwards.
Here’s how to make a scan in iScanner:
If you’re scanning in difficult circumstances (like trying to catch one paper in piles of others) or adding an already existing imperfect scan, here’s how to apply manual cropping in iScanner:
Now, let’s quickly go through the list of other available features that could come in handy. Apart from cropping, you can:
Just a tip: If you need to use both manual cropping and AI correction on a document, make sure to crop it first. Otherwise, the results of the AI correction will be lost.
iScanner works on both iOS and Android.
Macs have a magic built-in application called Finder that also makes it possible to work with PDFs. Apart from viewing, it offers several features for adjusting scanned files, and cropping is one of them.
So, here’s how to crop a scan with Finder:
The drawback? Finder includes several key tools for working with PDFs, but it’s still limited if you need advanced editing beyond cropping or highlighting, for instance.
There are two ways to do it on a Windows computer. The first, and probably easiest, is to crop a file using a free online tool. Plenty of them are available, so you just need to try a few and find the one that works best for you.
The second option is to use a built-in Windows feature called the Snipping Tool. Here’s how: