
27 feb 2026
Photographers and designers have known these things since their college days, but for everyone else, dpi can be a bit confusing. Let’s break down how it affects the quality of your scans and images and, most importantly, how you can easily work with it.
To answer this question, we should dive into the theory, but just a bit. Dpi stands for dots per inch. It describes how many tiny dots of ink a printer places within one inch of paper. The more dots per inch, the more detailed and sharp the printed image will be.
The thing is, printers don’t print continuous tones. Instead, they use a technique called halftoning, which creates the illusion of different shades by arranging tiny dots in patterns. And when we look at them from a distance, our eyes blend these dots together, making the image look continuous.
As for the figures, it goes like this:
Now, a misunderstanding can occur: why do we sometimes see “dpi” mentioned when talking about digital images, even though it refers to printers? In everyday speech, people often say “dpi” when talking about image resolution, even if they actually mean ppi (pixels per inch). In other words, both dpi (for printers) and ppi (for digital images) affect how sharp and detailed the final print appears.
For the sake of clarity, when speaking about digital images, we’ll use both terms interchangeably (just as Apple and Windows do, as you’ll see very soon).
You can check your image’s dpi in the file settings.
On Mac, open the file and click Show Inspector (Cmd+I) to open the General Info panel. One of the fields is called Image DPI, and it’s listed in pixels/inch. Have you spotted the inaccuracy? That’s right—it’s actually ppi, since it refers to pixels, not dots. However, that’s quite a normal situation these days.
On PC, right-click the image, choose Properties, and then select Details. In the Image section, you’ll see the Horizontal Resolution and Vertical Resolution fields with the image’s dpi mentioned there (yes, actually, those values also refer to ppi).
There are two strategies to achieve a higher dpi: initially create the image at a high dpi, or reduce the print size of an existing image.
This approach is easier and more effective. Basically, it means creating your image with large enough pixel dimensions so that it won’t lose quality when printed. You can set a higher resolution in your phone’s settings, not to mention on professional cameras.
To make things even simpler, you can use a dedicated app that lets you set the exact dpi you need. One such app is iScanner.
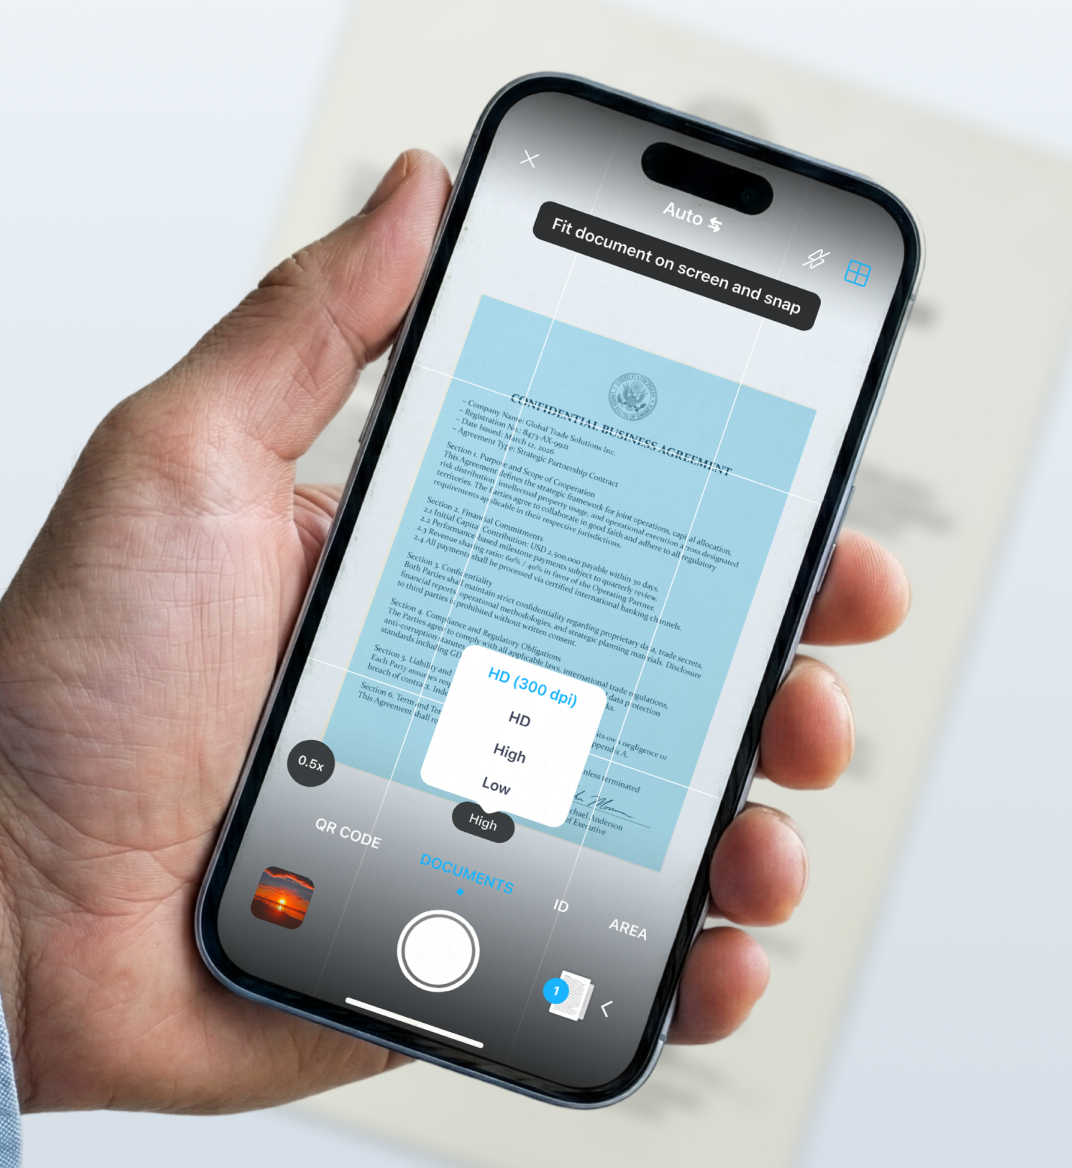
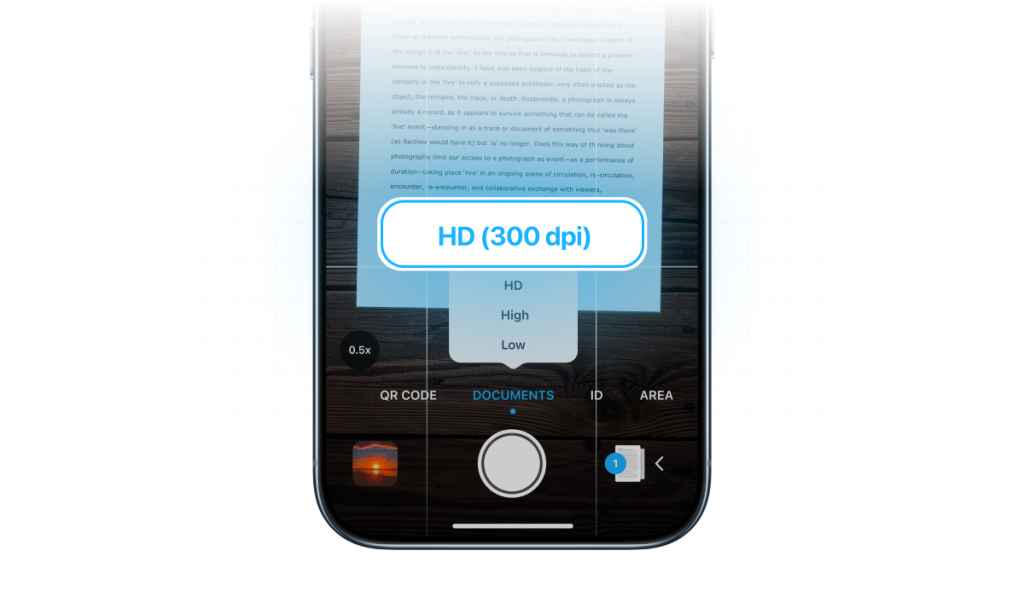
When you scan a document, photo, or image with iScanner, the app lets you choose the scan quality, which directly affects the dpi. There are four options: low, medium, high, or HD (300+ dpi). By selecting a higher dpi before scanning, you’re telling the app to capture more pixels per inch, making your image sharper and better suited for printing. This way, you’re starting with the right resolution from the start.
The best thing is that setting the dpi in iScanner takes just three steps:
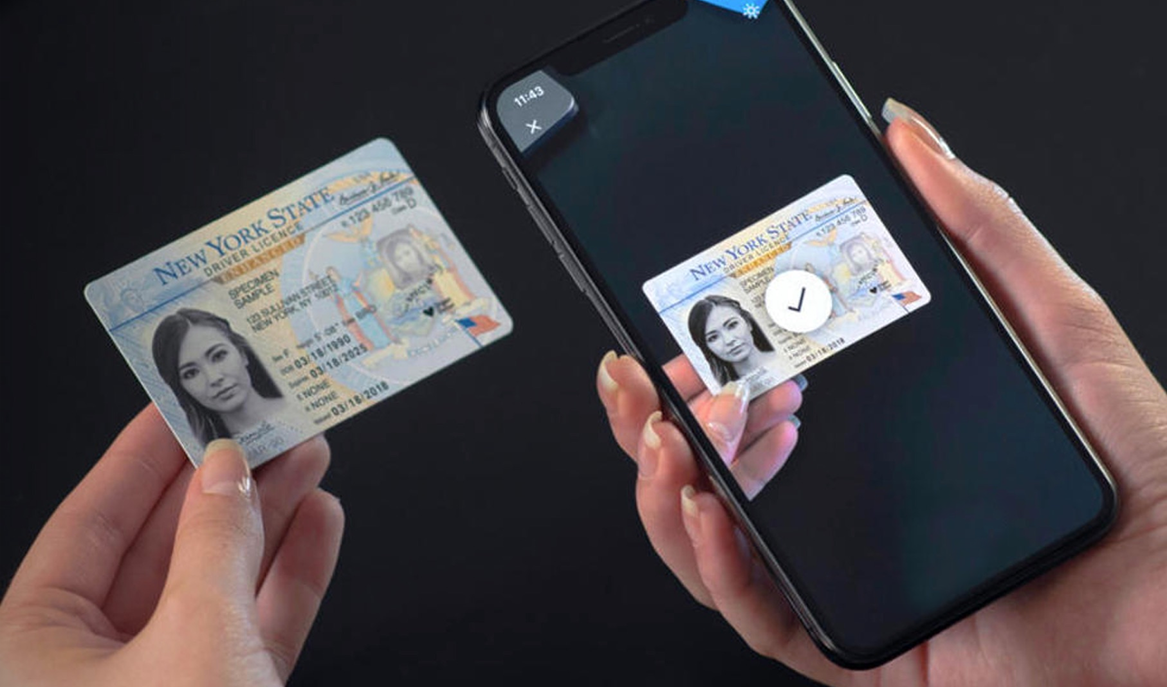
Low and medium options are good for digital use, while high/HD dpi (300+) are perfect for printing without losing detail. Moreover, it’s not about printing only. Some colleges and universities require scanned documents at 300 dpi, especially when it comes to transcripts, diplomas, certificates, or IDs.
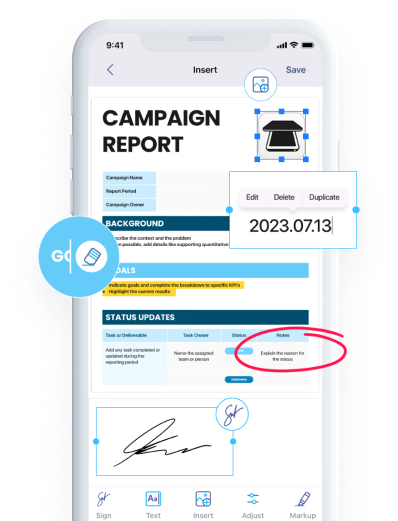
Apart from letting you scan at the exact dpi you need, iScanner makes it easy to work with your scanned files. With just a tap, you can fix pages that are slightly crumpled, skewed, or shot at an awkward angle. It can even restore damaged edges or remove fingers that accidentally got in the frame. Moreover, if you have a poor quality copy, or even a copy of a copy, iScanner’s deblur feature can help you make the image sharper and more legible. Plus, you can e-sign documents right in the app, which is quite handy when handling paperwork.
The second strategy isn’t about increasing the detail in your image; it’s about changing how your existing pixels are distributed.
If you reduce the print size of the image, the same number of pixels will occupy fewer inches, which will eventually raise the dpi number. However, this won’t make the image sharper than it originally is; it just fits the required dpi for printing.