
18 dec 2024
Google Classroom is one of the most popular educational platforms, but teaching there can sometimes be challenging and time-consuming. However, with the right tools and knowledge, you can customize the learning process to meet your needs and save valuable time. Plunge into this guide on how to use Google Classroom and find practical tips that will streamline your teaching and empower your students to make the most of their learning journey.
We’ve previously shared a few tips to enhance your Google Classroom experience. Now let’s explore four additional strategies to unlock the full potential of this powerful platform.
The Topics feature in the Classwork tab is made to categorize your lessons and tasks. It’ll simplify your students’ learning experience and save them time. To systematize the education process, click the Create button, select Topic, and enter the desired name.
Now, it’s time to decide how to structure your topics. One option is to organize them by units and modules. It means that you break your topic into several units, each of them consisting of one or more modules. For example, if you’re teaching history, you can divide the course into several units like Early Civilizations, Ancient Greece, the Renaissance, World War 1, and so on. You can further break down a unit, like World War I, into three modules:
Another approach is to structure your content by weeks of study. In this case, instead of naming units, you can label them with the corresponding week (e.g., Week 1, Week 2, etc.) or even use specific dates (e.g., 1–7 September, 8–14 September).
Alternatively, you can organize the process by assignments. The workflow is just the same, but instead of units, weeks, or dates, you use task types (Tests, Group Work, Individual Tasks, Drills, Homework, etc.).
You can choose any of these methods—or a combination—depending on what works best for everyone. The key thing here is to pick a structure that supports your students’ learning needs.
Incorporating iScanner into your workflow can also help you save time and work more efficiently with Google Classroom.
First, the app quickly and easily scans worksheets, assignments, and notes and can save them as PDFs directly to Google Drive. These files can then be effortlessly shared or accessed when needed.
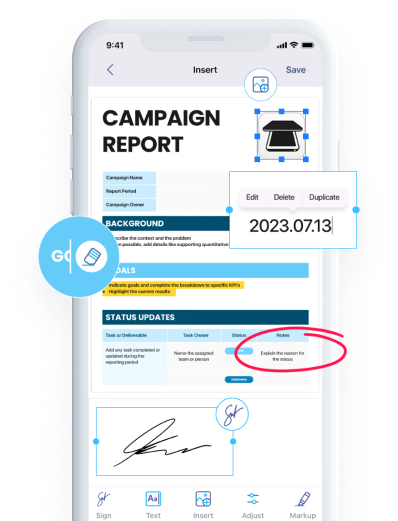
Second, iScanner allows you to edit scanned files right inside the app. You can annotate your files with labels, emojis, or dates. This may enhance your labeling system (we’ll discuss it in the next section) and keep materials organized. Additionally, iScanner’s OCR (Optical Character Recognition) technology lets you modify text within scanned documents, converting them into editable PDFs. This makes it easy to copy, paste, and modify content as needed.
Third, you can upload documents from iScanner directly to Google Classroom in just a few steps. Here’s a simple guide that takes less than a minute to follow:
Once you’ve organized your topics, you can take it a step further and create a labeling system for your assignments. This involves adding a prefix to the title that conveys a certain meaning.
For instance, you can use numbers to indicate the specific week and day for the assignment to be accomplished. If a test is scheduled for the third week on Friday, you can label it 3.5 (third week, fifth day). Using the same prefixes for related documents on your Google Drive will make it easier for you and your students to find relevant files.
Another option is to add emojis to the titles to represent the type of assignment. You can use ✍️for essay assignments, ?for an assignment that involves outdoor activity, and so on. This element draws attention, helps engage your students, and adds a fun element to the learning process.
The simplest labeling system uses consecutive numbers. Add a hashtag followed by the assignment number, such as #001 for the first task, #002 for the second, and so forth. You can apply this same system to related Google Drive documents for easy searching. Moreover, this approach creates a sense of accomplishment among your students. It’s much more rewarding to tackle task #072 knowing you’ve already completed 71 others.
There are no strict rules, and you can create your customized labeling system. The most important thing is to keep it intuitive, transparent, and helpful for everyone involved.
There’s no need to create a new class from scratch or copy and paste assignments if you need to reuse them. Instead, you can just copy an existing class along with its topics, assignments, and directions for students.
To do that, click Settings (three dots) next to the class you need on the Google Classroom home page and choose Copy from the dropdown menu. The copied class will be saved as a draft, ensuring that students cannot see it until you are ready to share.
You can also create a reusable class template this way and adjust it whenever you need it, saving time and effort for future classes.
